


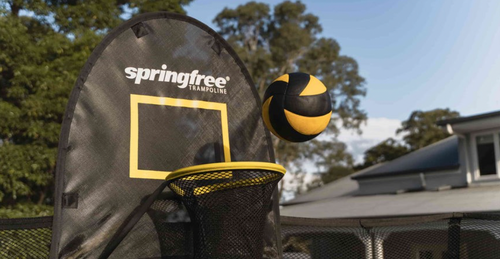
Master your Springfree Trampoline Basketball Hoop installation with our expert tips. Follow our foolproof steps to enjoy your game without reassembly headaches!
4 MIN READ
Today, we’re going to tell you exactly how to assemble your Springfree Trampoline Basketball Hoop.
These steps are important.
If you don’t follow them in order, you might have to take down your trampoline and reassemble it again. Nobody wants to do that!

Tips for an Efficient Springfree Trampoline Hoop Installation
Before starting your FlexrHoop assembly, here are some tips to make the process as smooth and safe as possible:
#1: Choose a location that considers ball over-throws and easy retrieval (i.e. don’t put the Hoop in the direction of your neighbour's fence.) Also, don’t put it in front of the zipper opening on round-shaped trampolines.
#2: Check that the plastic sleeves covering the net rods are intact and not cracked or damaged BEFORE installation. If you notice damage, contact us to order Springfree replacement parts.
#3: If you haven’t assembled your Springfree Trampoline yet, install the Hoop before raising the net! You will have to take the net rods off, install the Hoop and put the net back up again.
(Check your trampoline accessory manuals before assembling your Trampoline. It will make your installation more simplified.)
How to Install the Springfree Trampoline Basketball Hoop
These steps are courtesy of our Springfree Trampoline Basketball Hoop Manual and our Springfree Trampoline US Basketball Hoop Installation video.
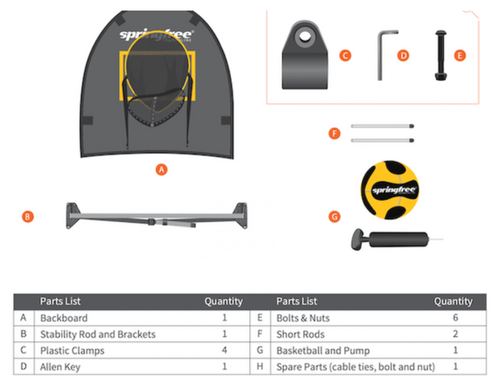
Before starting the installation, here are the Springfree Trampoline Basketball Hoop parts you will need. We recommend TWO people for assembly! The assembly time is around 30 minutes.
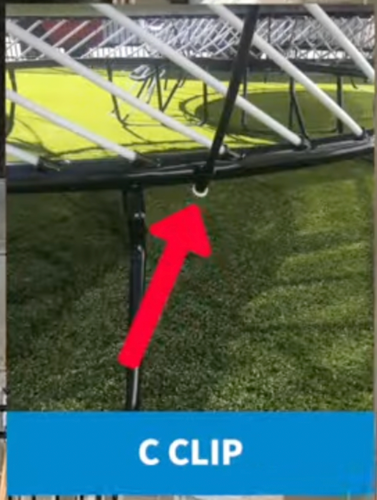
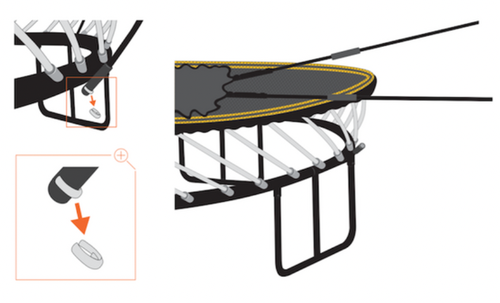
Step 1: Remove the White C-clips located on the net rod sockets and carefully lift the bottom of the black net rods out of the net rod sockets. Lower the net so the net and rods are lying on top of the mat.
Important note: Be careful when removing the net rods from the sockets since there will be tension in the rod. Use two hands and keep your face away from any loaded road.
Step 2: Carefully cut open your Hoop box and lay the pieces out on top of your box. There are extra parts included.
Step 3: Select two adjacent net rods. These will be the mounting rods where you will locate your Hoop on the trampoline.
Place the hoop face down inside the two rods that you would like to mount the Hoop in between. Snap the two rim straps under the edge of the backboard to the back side.
We recommend opposite the entryway on round trampolines and of any of the curved frame sections on oval or square models. These “mounting rods” will support the Hoop.
Step 4: Place the Hoop inside the net.
Step 5: Empty the contents of the hardware bag on the edge of the trampoline as well as the two short rods to get prepped for the installation of the large brackets. The contents of the bag are listed in your instruction manual.
Step 6: Clip the first plastic clamp in the gap just under the net rod pocket. Clip the second plastic clamp roughly five inches below. Do the same on the other enclosure rod. SEE the video above for how this looks.
(Ensure the plastic clamps are facing inward!)
Step 7: Undo all the nuts from the bolts and carefully set them aside.
Step 8: Locate your stabilising rod and brackets. Bow the stabilising rod until it’s the same width as the backboard.
To do this, take hold of one of the brackets and gently push the other bracket up against a firm surface.
Use your free hand to pull the strap. Continue bowing the stabilising rod until the width of the stability bracket is roughly the width of the backboard.
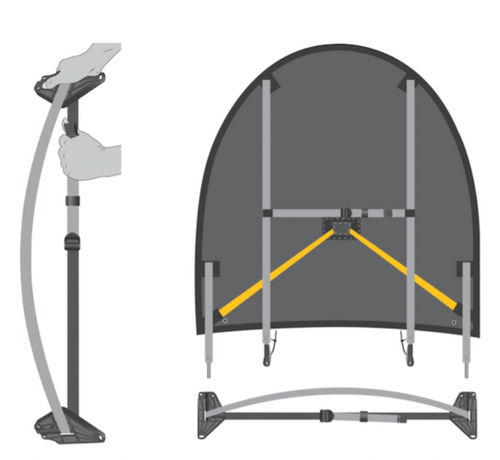
Step 9: Take your short rods and insert them into the sleeve on the stabilising bar and then into the sleeve on the back of the Hoop.
The short rod that you insert into the sleeve and the long rod that is already inserted into the sleeve will attach to the large brackets that are attached to the stabilising bar.
This will need to be attached using your nuts, bolts and cable ties using your Allen Wrench for both the left and right side.
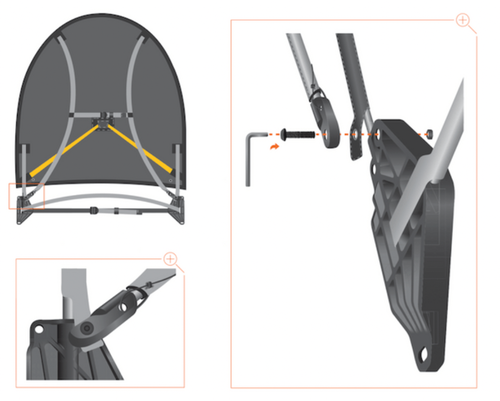
Step 10: Now it’s time to connect the large brackets to the net rods that hold the net. Hold your finger on the nut as you use the Allen Wrench to tighten. (Pictured above).
Step 11: After hoisting up the net be sure to place all the white C-clips back into their place.
Now it’s time to hoist the net up and put the enclosure rods back into the net rod sockets. SEE the video above for the technique you should use.
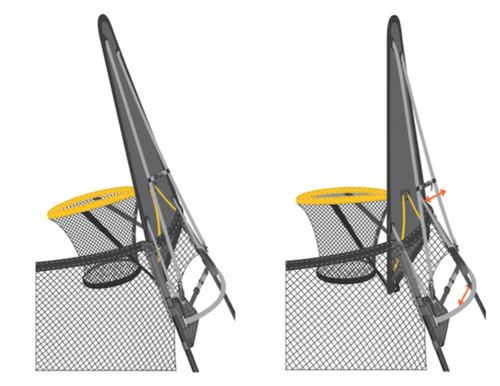
Step 12: Make sure the Hoop stands level. If not, you can adjust the verticality of the backboard with 2 straps – a combination of the stabilising bar strap and the one above it behind the backboard.
All you have to do now is pump up the ball and have fun! Still have questions? Reach out on our live chat or via email!